I posted this whole tutorial on AJE blog yesterday. Please check it out! You can find an earlier version on my Tutorials page!
Some of you may have seen ornament or suncatcher hangers and said, I can do that! Some of you may have seen them and said, How do I do that? This tutorial is for you. This is for a simple ornament hanger you can make all by yourself with a few tools and wire!
 1.
Start by flush cutting a 3" piece of wire with your wire cutters.
Notice I used the ever-popular dinosaur ruler we got in a shoe-store
many moons ago!
1.
Start by flush cutting a 3" piece of wire with your wire cutters.
Notice I used the ever-popular dinosaur ruler we got in a shoe-store
many moons ago!
2. Using the round nose pliers, place your wire 1/3 of the way down the plier and make a loop. If you are making lots of hangers, you may want to use a sharpie to mark the place where you want to wrap the wire if you want them all uniform in size.
3. Finish the loop all the way.
4. Place the loop in the Wrap-N-Tap plier on the first round. If you want larger loops for your hanger, you should cut a larger piece of wire. Make sure the loop is secure in the plier and in the direction you want it to go!

5. Using your thumb, wrap the wire around the loop of the Wrap-N-Tap plier all the way. Remove it from the plier, and you will have a hook with a loop on one end at this point.
6. Using the bottom 1/3 of your round-nose pliers, make another loop, which will be bigger than the first loop.
7. Finish shaping if you need to. At this point, you can work harden with a mallet if you like. I prefer to tumble mine because in addition to hardening the silver, it makes it all nice and shiny!!!
You can also embellish them with wire and beads! Here, I used thin gauge copper wire and blue seed beads.

Below is an ornament I made with one of my baroque lampwork beads, bronze wire, and a chandellier part!

This is a suncatcher I made with a set of three baroque beads and a vintage chandellier crystal.
 I can think of many other ways you can embellish the hanger, or add interest to the wire, can you?
Some of you may have seen ornament or suncatcher hangers and said, I can do that! Some of you may have seen them and said, How do I do that? This tutorial is for you. This is for a simple ornament hanger you can make all by yourself with a few tools and wire!
Tools:
Ruler
Wire Cutter
Round Nose Pliers
Wrap-N-Tap pliers (large)
Ruler
Wire Cutter
Round Nose Pliers
Wrap-N-Tap pliers (large)
Supplies:
18 gauge silver-filled or silver-plated wire
18 gauge silver-filled or silver-plated wire
 1.
Start by flush cutting a 3" piece of wire with your wire cutters.
Notice I used the ever-popular dinosaur ruler we got in a shoe-store
many moons ago!
1.
Start by flush cutting a 3" piece of wire with your wire cutters.
Notice I used the ever-popular dinosaur ruler we got in a shoe-store
many moons ago!2. Using the round nose pliers, place your wire 1/3 of the way down the plier and make a loop. If you are making lots of hangers, you may want to use a sharpie to mark the place where you want to wrap the wire if you want them all uniform in size.
3. Finish the loop all the way.
4. Place the loop in the Wrap-N-Tap plier on the first round. If you want larger loops for your hanger, you should cut a larger piece of wire. Make sure the loop is secure in the plier and in the direction you want it to go!

5. Using your thumb, wrap the wire around the loop of the Wrap-N-Tap plier all the way. Remove it from the plier, and you will have a hook with a loop on one end at this point.
6. Using the bottom 1/3 of your round-nose pliers, make another loop, which will be bigger than the first loop.
7. Finish shaping if you need to. At this point, you can work harden with a mallet if you like. I prefer to tumble mine because in addition to hardening the silver, it makes it all nice and shiny!!!
You can also embellish them with wire and beads! Here, I used thin gauge copper wire and blue seed beads.

Below is an ornament I made with one of my baroque lampwork beads, bronze wire, and a chandellier part!
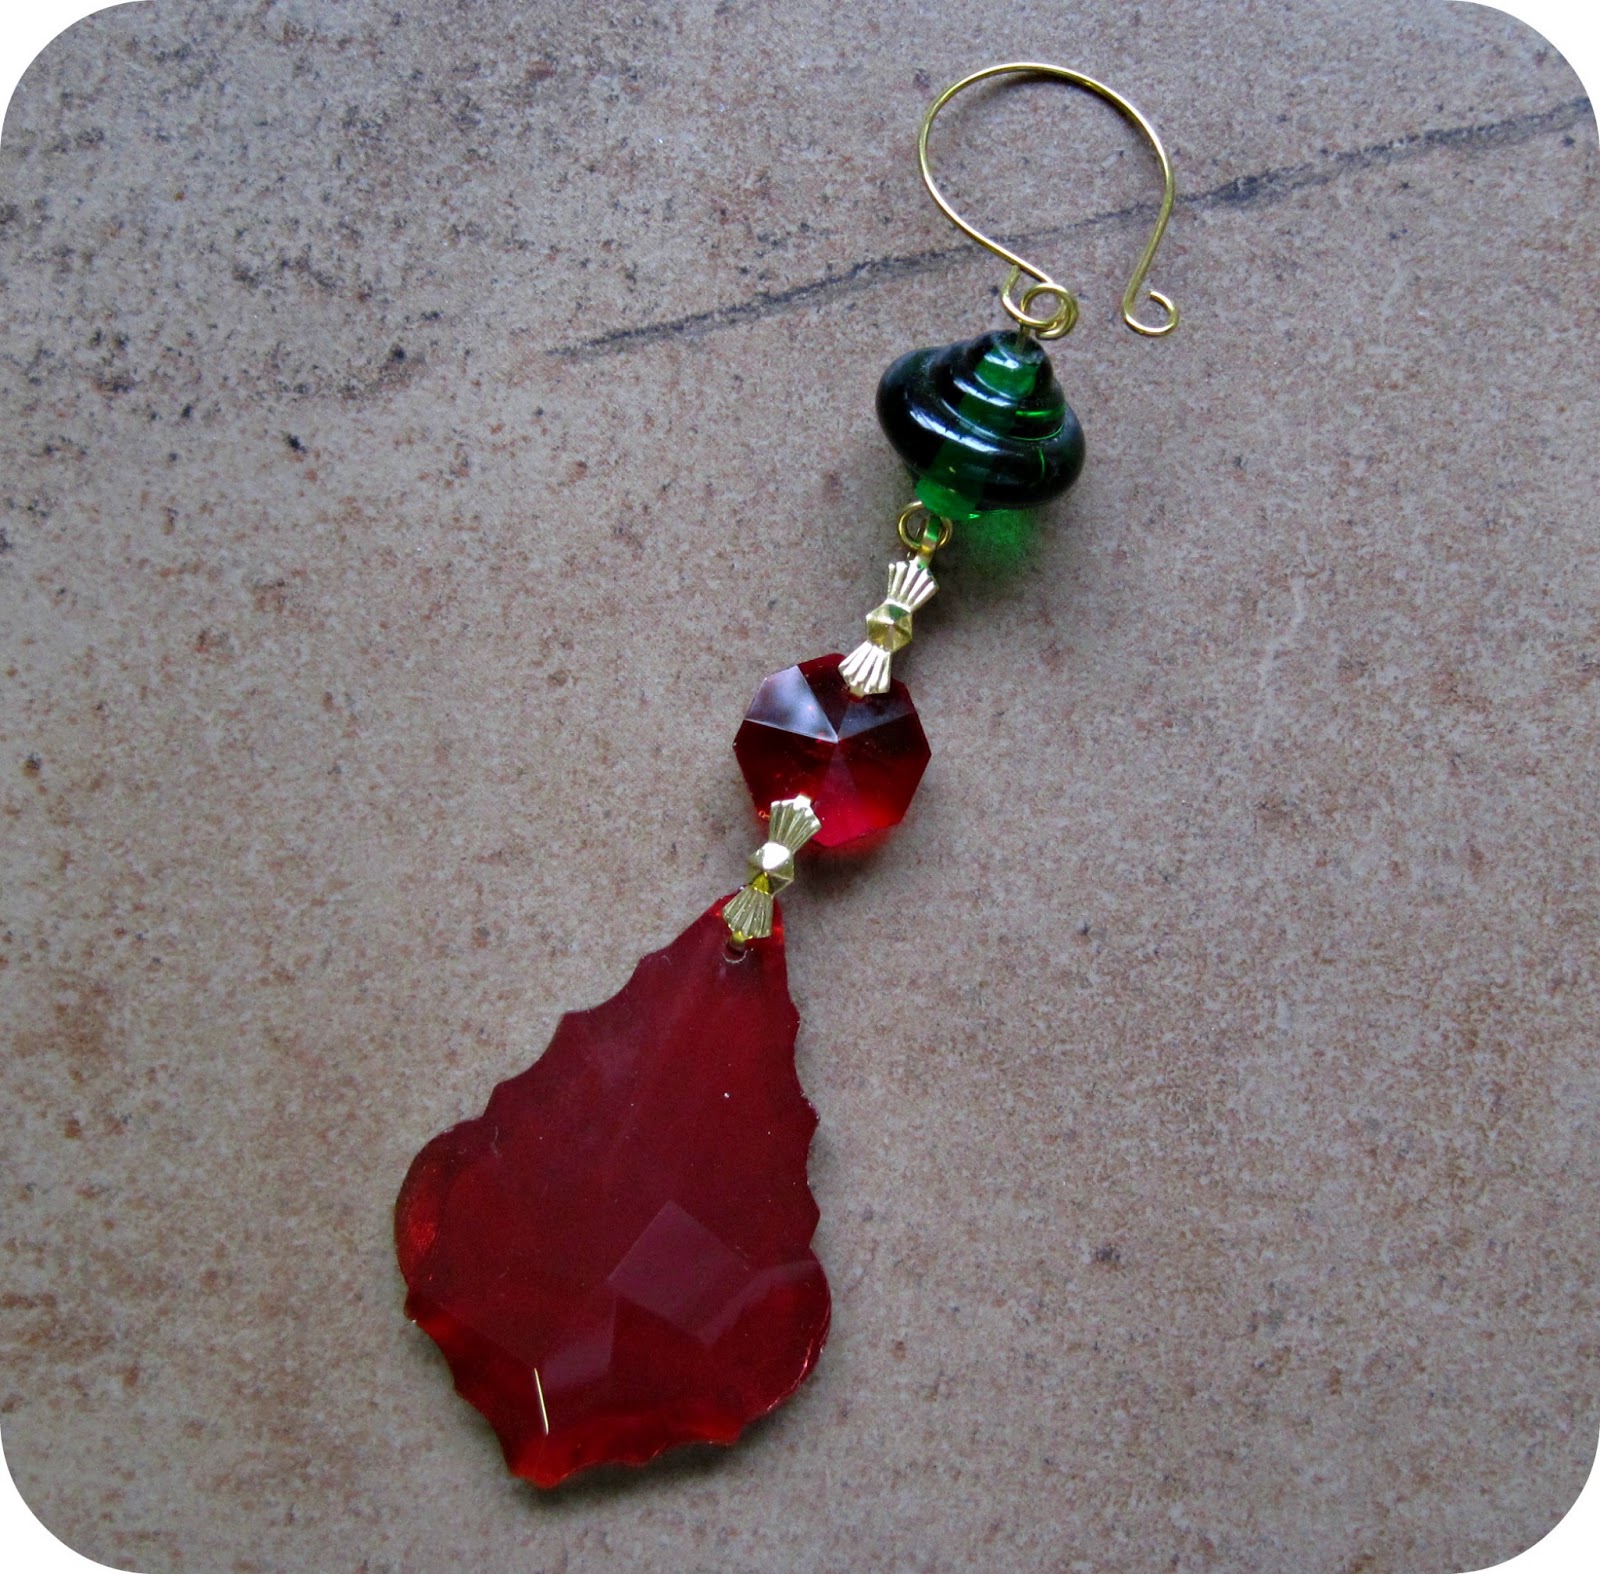
This is a suncatcher I made with a set of three baroque beads and a vintage chandellier crystal.

Comments